Select an Installation Option
This article gets you started with CloudShell installation.
Note: If you need to set or re-set the CloudShell License Server after CloudShell installation, run CloudShell installation using the Custom / Upgrade installation option and select the CloudShell License Server component. For additional information, see Custom Component selection.
In the Type of Installation window, select the type of installation to run.
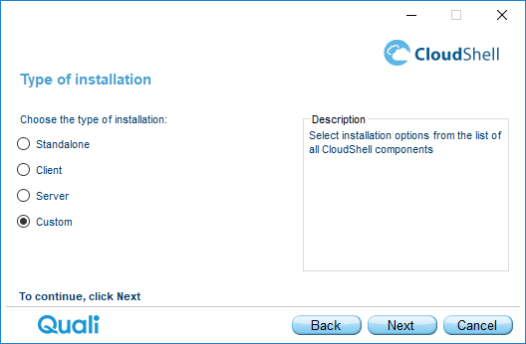
The CloudShell installation types are listed in the following table.
Installation type
Description
Standalone
Select Standalone to install the client and server applications on a single machine.
Note: Standalone does not install the License Server component. We recommend selecting Custom and choosing the specific CloudShell components you wish to install.
During the Standalone installation, SQL Server 2016 Express SP1 is installed and all required databases are created automatically on that server.
Note: If an older SQL Server Express version is already installed, CloudShell will install SQL Server 2016 Express SP1 separately without modifying or removing the older versions.
Client
Select Client if the Quali Server has been centrally installed on your network. This enables you to customize your installation and install the necessary local components.
The Client installation installs one or more selected clients on a local machine.
Server
Select Server to install the server applications.
You can install Quali Server and CloudShell Portal on separate machines.
Custom
Select Custom to manually choose the components to install. For more information about the available installation components, see CloudShell Components.
- Click Next to select the components to install.